Experimenting with Furry Textures in TouchDesigner
Category: Experimentation, TouchDesigner
1. Introduction
Continuing my journey into TouchDesigner, I followed a YouTube tutorial to create a furry texture effect. This experiment helped me explore noise manipulation, the Lookup TOP, and working with 3D geometries. While I initially intended to make the effect audio-reactive, I postponed this to focus on understanding the tools and techniques.
In this post, I’ll summarize the process, highlight key insights, and share the resulting visuals.
2. What This Experiment Does
The goal of this experiment was to create a dynamic, moving furry texture by combining:
- Noise TOPs to generate the base pattern and movement.
- 3D Geometry for depth and layering.
- Lookup TOP for creative color mapping and blending.
- Post-processing effects to refine the visuals and bring the texture to life.
3. How It Works: Node Breakdown
Key Nodes and Their Functions
Here’s a summary of the main components in the node structure:
-
Base Geometry (
Grid TOP):- The grid serves as the canvas for generating the texture.
- It is linked to 3D rendering to create the depth and furry-like appearance.
-
Noise Generation (
Noise TOPandFractal TOP):Noise1: Creates the base noise pattern that simulates fur strands.Fractal1: Adds complexity and variation to the noise, making the texture appear more organic.
-
3D Rendering (
Geo,Cam, andLight):Geo1: Translates the 2D noise patterns into a 3D visual space.Cam1: Controls the viewing angle and perspective.Light1: Adds illumination to enhance the texture and depth.
-
Feedback and Refinement (
Blur,Null, andComp):Blur1: Smooths the texture for a more natural look.Comp1: Combines layers for added depth and detail.
-
Color Mapping (
Ramp TOPandLookup TOP):Ramp1: Defines the color gradient for the texture.Lookup1: Maps the noise output to the gradient, resulting in colorful fur strands.
-
Post-Processing (
Transform,Out, and Additional Noise`):Transform1: Scales the effect to fullscreen.- Additional Noise: Adds subtle variations for interactivity and texture.
4. Observations & Insights
What Worked Well:
- Noise Variations: Experimenting with different Noise TOP settings (e.g., amplitude, frequency) produced a wide range of effects, making the texture dynamic and engaging.
- Lookup for Color Control: The Lookup TOP allowed me to map gradients creatively, resulting in a visually rich effect.
- 3D Integration: Rendering the noise as 3D geometry brought depth and realism to the furry texture.
Challenges:
- Node Complexity: Managing the connections and parameters in a dense node network required careful attention.
- Audio Reactivity: While I planned to make the texture respond to sound, I paused this step to focus on refining the visual aspect.
5. What’s Next?
Building on this experiment, I’d like to:
- Add audio reactivity by linking the noise parameters or color mapping to an audio input.
- Experiment with motion tracking to make the texture interactive.
- Explore shader-based approaches for more control and efficiency in generating complex textures.
6. Resources
- YouTube Tutorial: Furry Textures in TouchDesigner
- Nodes Used:
Grid,Noise,Fractal,Lookup,Ramp,Geo,Cam,Light,Blur,Transform,Out
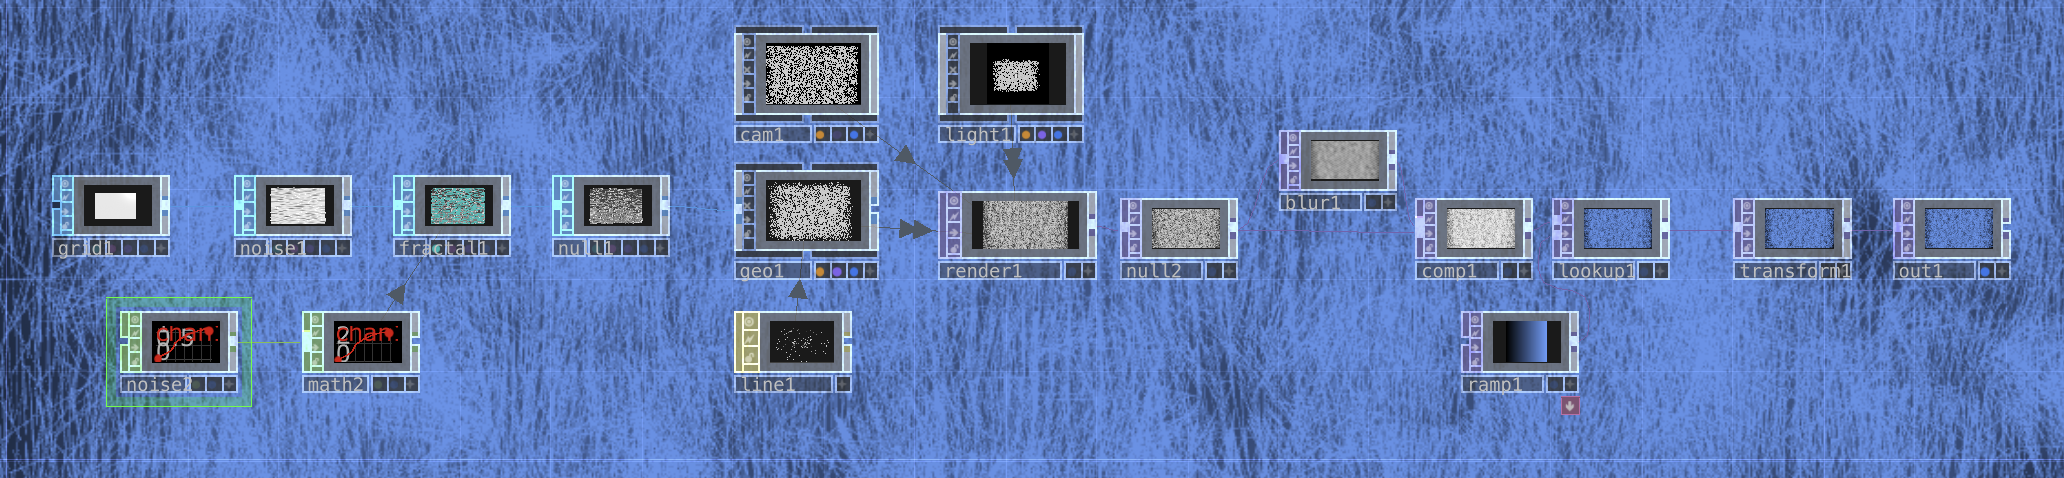
7. Node Network & Result
Node Setup:
Here’s the node structure used in this experiment: