Experimenting with the Particle GPU in TouchDesigner
Category: Experimentation, TouchDesigner
1. Introduction
For this experiment, I explored the Particle GPU TOP in TouchDesigner to create a visually engaging particle-based effect. My goal was to transform video inputs or other sources into a dynamic particle simulation. This experiment allowed me to understand the fundamental workings of the Particle GPU and its creative applications for interactive visuals.
2. Node Setup and Breakdown
Key Nodes and Their Roles
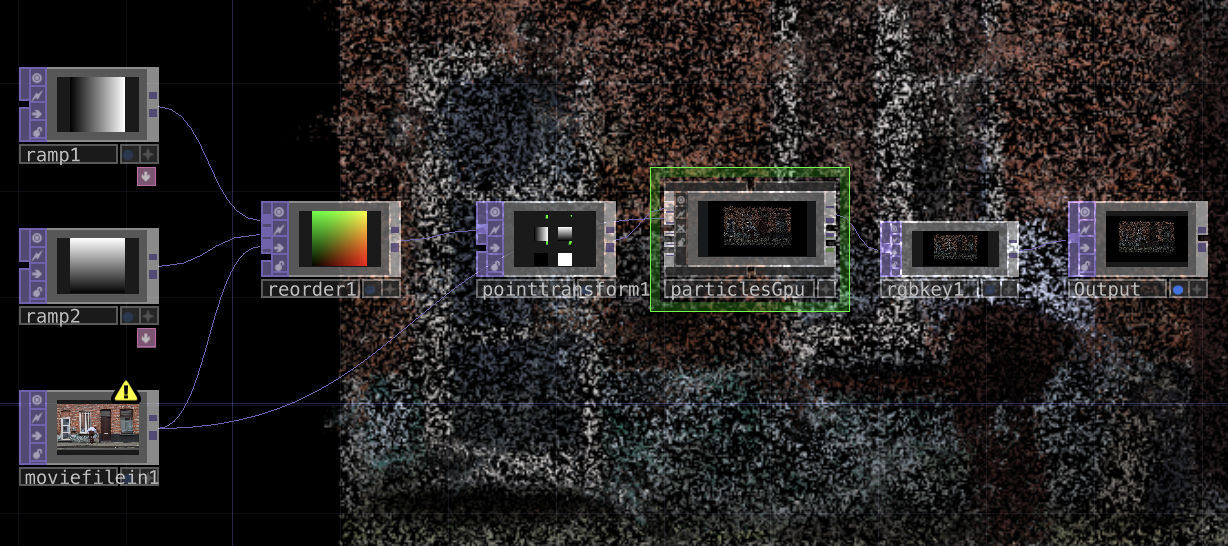
Below is an overview of the primary nodes used in this experiment:
1. Input Sources:
Movie File In TOP: This node imports a video file, which serves as the base input for generating particles.Ramp1andRamp2: These ramps add gradients to control particle attributes, such as color and intensity.
2. Reorder TOP:
- Combines the outputs of the ramps and the video input, preparing the data for the particle system.
3. Point Transform:
- Manipulates particle positions by applying transformations and aligning points with the visual content.
4. Particle GPU TOP:
- This node generates the particle system based on the input image/video. It uses GPU acceleration to handle large numbers of particles efficiently.
- The node allows for parameters like:
- Particle lifespan
- Velocity
- Spawn rate
- The video is broken down into pixel-like particles, creating a experimental effect.
5. Crop Key TOP:
- Masks or crops the particle output, ensuring the focus remains on the desired area.
6. Output TOP:
- Finalizes the visual output for display.
3. Observations
What I Learned:
- The
Particle GPUTOP is highly versatile and ideal for creating dynamic, particle-based visuals from any input. - Using ramps and reordering data can control attributes like color and position, giving you more creative flexibility.
- By combining transformations with particle effects, you can produce engaging, motion-driven designs.
Challenges:
- It was suprisingly easy to fine-tune the particle attributes (e.g., velocity and lifespan) to achieve the desired effect.
4. Next Steps
- Experiment with audio-reactive particles, linking sound inputs to the particle system for a synchronized effect.
- Integrate body tracking to generate particles based on user movement, creating interactive visuals.
- Explore advanced blending and compositing techniques to combine multiple particle layers.
5. Resources
TouchDesigner Documentation:
Video Tutorial:
6. Node Network & Result
Node Setup:
Here’s a screenshot of the node network:
